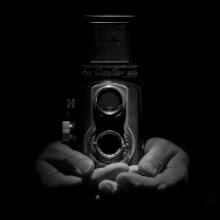
I really like these old cameras. They are so simplistic, dependable, and cheap that it's hard not to enjoy using them. They shoot 6x6 film, and most will shoot fine with a 120 roll on the feed side, and a 620 spool on the takeup.
There are two things that I always wished I had with my BHF's in the field. One is a cable release, and the other a tripod mount. A while back I had seen on the web where people have added these refinements with some decent success, so I decided to give one of my the same upgrades.
Functionally everything works very well, just as it should. The aesthetics are nice too, although the cable release hole was a bit of a challenge to keep strait. I was using a cordless drill, and a workbench to make the holes needed. I believe the best would be to anchor the pieces on a drill press if you have one accessible.
To complete this project, a couple of items are needed from the hardware store. For the tripod mount I used a 1/4x20 acorn nut. I thought this would be the best since it is solid and I wouldn't have to worry about light leaks when it's not on a tripod. The next critical item is the threaded bushing that will anchor the cable release point. For this I was able to find a round aluminum threaded bushing that fits perfectly to my cable release. It took a few minutes combing through all the stuff they had trying them with my cable release in hand, but they had a perfect fitting bushing so I was happy. The next item from the hardware store was some epoxy to bond the new pieces to the camera body. Lastly, some flat black paint to spray over the epoxy'd acorn nut. Tools needed were simple also. I used a cordless drill and a couple different bits for the appropriate sized holes needed, and a phillips head screwdriver.
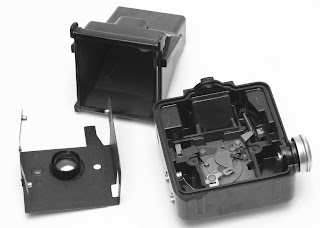
For this process I disassembled the camera as if you were cleaning the lens. That is to open the shells and remove the film box from the front of the camera including removal of the metal plate that covers the shutter assembly. Once disassembled, I was able to measure very carefully where to locate the c
 able release bushing. The best advice I can give is to measure the depth to the backside of the camera face, and also the depth to the plane just beneath the shutter cover plate. Once measured, transfer these measurements on top of the camera between the shutter button and the looking lens. This is where the hole will be drilled to drop the threaded cable release bushing into place and epoxy. It took a few steps to reach the final depth for this bushing. I was content to drill and measure with the cable release operation in order to get it correct without drilling too far. Once I verified that the cable release operated fully, I then epoxy'd the bushing into place. Before reassembly, to ensure the camera face was light tight, I stuffed some tight woven black felt under the shutter mechanism cover plate.
The tripod mount was very simple to install. With the shell open, I measured to the centerline and about 3/4 of an inch back from
 the lip. Here I drilled a hole large enough for the 1/4x20 acorn nut to seat well. Once situated, I carefully taped the acorn nut into position from the outside of the camera shell. This allowed me to apply the epoxy from the inside without it oozing all over my work surface. Once dried, a quick shot of flat black paint and everything was set. It should be noted that something will be required make this area light tight as there will be a round hole larger than the hex flats on the acorn nut. Even though the epoxy is dense, it does transmit light and would fog the film. The photos I took were actually prior to the painting for mine.
In all, I think I have about two hours in this project, and can hardly wait to try this BHF out using timed exposures, or just using the foolproof tripod mounting. Wh
 y go through all this when I have dozens of cameras that already have provisions like these??? Well, why not do it? I love my BHF cameras and consider them well worth a little upgrade to make them more usable.

So glad to find your blog. Love what you're doing with this camera ;-)
ReplyDelete