Saturday, November 12, 2011

Box Cameras & Electronic Flash

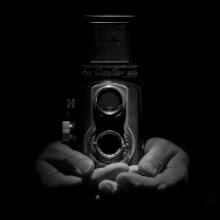
Recently I've been tinkering with old box cameras that have flash sync on them. These old cameras were designed, and synchronized, for use with flash bulbs. I hadn't given it much thought at all months ago when I hooked up a modern electronic flash to one of my Kodak BHF cameras. It didn't take much to get it to fire a flash, so I shot a roll of film expecting all would be well, but it wasn't.

I abandoned that idea for a while, but then recently gave some more thought to the idea. Of course there is no real reason why I would need to do this since I have plenty modern cameras that are flash ready, but still, I have a sweet spot in my heart for old cameras. After taking apart a BHF, and staring at the shutter mechanism for what seemed like hours, I figured out what it needed. I needed to mechanically alter the timing of the flash striker about 100ms, and that would permit the shutter disc to completely clear the aperture before firing the flash.

This was easy to test too. After making adjustments, I left the back off the camera, placed by eye right up to the camera and fired the shutter. If you do this on an original, you will only see a small amount of ambient light since the flash is firing before the shutter disc is allowing light through the aperture. After making the adjustments though, if you do this same routine, you will get a nice blast of flash!


Okay, fast forward a bit. Having successfully modified a BHF and processed a test roll of film, I was quickly thinking about another camera. I have two Ansco Shur-Flash cameras, and being those are 6x9cm format, why not attempt to modify one of them? So I did just that.

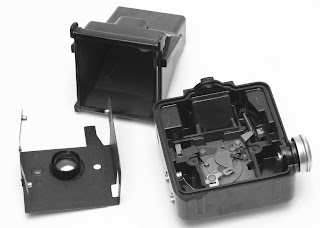
I went through the same basic process with the Ansco as I did with the BHF, and it too now fires the flash at the exact instant the shutter disc has cleared the aperture. In the photos below are the mechanisms of the Ansco Shur-Flash. The key components are circled and are in different colors.


A- Flash contact.
B- Flash sync striker
C- Ramp
D- Flash striker jumper.


I will try to explain the sequence of events to trip the shutter and fire the flash, but seeing is believing. I would recommend opening one up and observing it in action. When the shutter button is depressed, it causes D to move towards C. As D goes up the ramp C. it causes the striker B to be elevated above flash contact A. This is necessary to elevate the striker arm to clear the flash contact because contact is not made until the return stroke. So, when the shutter mechanism cycles, it causes the flash striker arm to travel down to the flash contact, and then return to the rest position seen here.


As seen in the photo to the left, you can see there is a wide foot that is used to make the actual contact between the striker arm and the flash contact. When the leading edge of the original 'foot' makes contact, the shutter disc is still closed. To complete this modification, it will be necessary to flatten that 'foot' shape to end up with a slightly down turned edge. This will cause the bitter end of the new shape to make contact just as the shutter disc has cleared the aperture. It will take a bit of fuss to get the timing correct for this, but it's not too difficult to accomplish. When making these adjustments it's easy to keep cycling the shutter slowly to see when you have reached the point when the contact is made just as the shutter disc has cleared the aperture.


Here are a few photographs made with the BHF I modified for electronic flash.
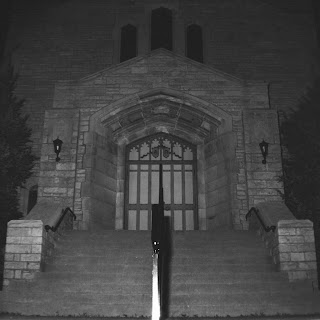
St. Johns Church. I used a Sunpak 522 to make these exposures as the little flash would not be powerful enough.
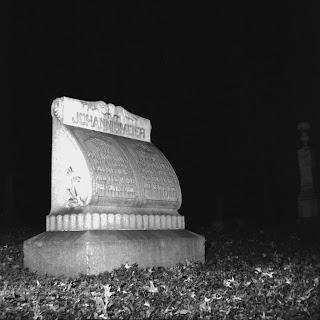


One of the more stately markers in the cemetery.


Here's another marker I really like. I also like the way this one was lit up in the background.
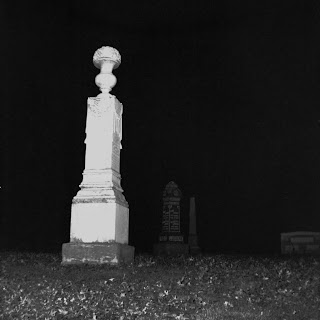


And here is a shot from the Ansco Shur-Flash. This was the only nice shot from that test roll. Evedentally the Ansco has a minimum focus distance of 6' or more. All the shots I took at around 5' were pure fuzz in the foregrounds, but clean at 6' and greater. Note to self...
Friday, April 15, 2011

Cut Film, Cut Flowers & Studio Lighting.

With the advent of Spring there are flowers blooming, and I like it. I have a few different bulb type flowers planted around my home, and tulips are some of those in my yard. I have seen tulips all over our area in full bloom for a good two weeks prior to mine opening up, but I am patient. Flowers in B&W can be tricky to pull off nicely, but I decided to give it a try with my tulips this year.


Over the past week of waiting before mine fully opened, I have thought about how exactly I wanted to shoot them. Heck, I have cameras-a-plenty in all the formats, but I decided on using my Century Graphic press camera since it takes sheet film. I really like the concept of sheet film. You can shoot just one or two sheets if you want. This is nice since it cuts down on wasting film and allows you to process right away, and it can cut down on the wait time while a roll is being finished. Besides, these are tulips. How many shots could it possibly take to artfully capture an arrangement of tulips on B&W film? I'm pretty sure I don't need a dozen or more shots to get the scene I have in my mind.


For the studio setup I kept it simple. One translucent umbrella with a modeling light (left side), an all black drop background draped over the table that was holding the vase of tulips. For this camera I have a few choices for film -Fomapan 100, Efke50, Efke100. I went with the Fomapan 100 since I really like how it looks in D-76 1+1. My stock D-76 is aging, so I took this opportunity to use some of it. For the camera setup, there are several ways this arrangement could be shot based on personal preference. I tend to like the deeper focus so I normally shoot scenes like this stopped all the way down. For this one I was set at f32 and 4 seconds on Bulb time to get it recorded on the Fomapan 100.


Another feature of the LF cut film cameras that I enjoy is the way composition is made through the ground glass. The subject is upside down, and flipped. To me it makes it simpler to focus on my composition this way compared to a reflex prism viewfinder. The shapes are upside down, and as such it's easier to disconnect from the scenes and pay attention to shape placement on the ground glass. I suppose this seems easier to me since everything really stands out when it's upside down. Our minds record scenes normally when using a reflex prism finder, and for me sometimes I find that I don't pay as much attention to how I am framing a scene since it all looks natural. Then again, this could all be in my head. That's the beauty of photography. There are a million variations, and millions of subscribers to each variation -none are wrong.

Sunday, April 3, 2011

Exposure Control & Zone Placement

Much has been written about exposure control in photography. What I've learned has been by experimentation, reading, practice, and by accident. What I am writing today is the same in theory as what has been written before by the pioneers of photography, but this will be my attempt to simplify the explanation.

Okay, last November I was driving down the freeway and happened to notice a landmark that I knew was there, but never really noticed it in detail before. The Jefferson Barracks National Cemetery is very large, and also very beautifully laid out. When I noticed this from the freeway I made a mental note to eventually get over there and shoot a roll of film. At the time I knew exactly the camera I would use too. I had a vision in my mind of something panoramic, and what better to pull that off than my Kodak No 3-A Model A camera that I converted to use 120 film yielding 6x14 cm negatives? Fast forward to present day and I made the trip with camera in tow.

Before I get into this too far, I should mention that something else I have been wanting to do is to regurgitate "Zone Control" using my expressions and experiences. With this in mind I grabbed a digital camera to take along. A lot of whats written about Zone System shooting has examples with explanations, however, I've never found one with color photographs. I know, seems nuts that I am reverting back to color, but we see in color, or at least I do. Sure would be cool if my headlights had a little switch to go B&W only, but mine just don't have that feature. So, I took a dSLR with me to shoot the scene how my eyes were seeing it, and from that hope to progress into Zone placement for B&W film. Oh, I also took along my trusty Minolta Spotmeter F. It's a 1 degree spotmeter, and I love the thing.


Okay, in the color photograph, with the ISO set to 200, and set to aperture priority, the camera selected 1/60th on the shutter, and the resulting image looks pleasing and exposed well for average metering. I selected 200 ISO since that is the film I would be shooting later, and also shot in aperture priority as I lean towards the long DoF of f16 or more. In this case it was set at f22.

When I am visualizing a scene, I try to focus on the features that really matter to me most. This is where there are many forks in the road. Everyone has their own tastes, and preferences here. For this scene I was visualizing the grass as something I definitely wanted placed in Zone 3. I prefer this to be dark, but with plenty of detail. From there I frame the rest of the lighting scene.

After converting the color image to B&W, it's easy to see how plain and boring the average metering is. After being converted, the grass has landed almost in Zone5, while the blue of the sky has landed in Zone 8 and the clouds in Zone9. What to do? Focusing again on the grass, if I stop down two stops I will have the zone I want for that part of the scene, but the sky will still be lighter than I like. There are other things that can be done to control lighting and the tones recorded on B&W film though. Filters are an excellent help here. Since I know I am working in the two zone range of adjustment, that makes me think of a heavy yellow filter. The filter factor is 2.5 stops, and would accomplish more for this scene than would an aperture adjustment. The #15 yellow filter significantly darkens the blues in the sky, and also provides separation between clouds and the blues. Visually, the effect this has on the light spectrum as recorded by the B&W film, is the effect more like a three stop adjustment, which is where I want it for this part of the scene. The last photograph is what was recorded using the Kodak No 3-A Model A camera with a #15 Yellow filter, shot at "I" 1/50th, and f22 on the aperture, and was just about exactly as I had visualized this scene for using B&W film.

Shooting Zone System is actually simple once practiced a little. This is especially true with modern cameras with good lenses having aperture ranges up to f22 or f32, and with modern shutters that typically range from a few seconds up to 1/1000 or faster. One little challenge I have with some of my gear is the limitations on shutter speeds. The Kodak No 3-A Model A I was using has three settings for the shutter - I B T. Instant is about 1/50th, Bulb, and Time are just that. The good thing about this camera is the aperture range is from f4 up to f128! Another challenge is that the original lens has no provisions for filters. As seen in the photo of the camera nose, I made up a couple adapters to use with my oldies. This really helps control lighting with filters on these old cameras with limited shutters. The adapter is nothing more than a Kodak Series VI 1 1/4" adapter ring that I epoxied to a modern filter ring size adapter (49mm~58mm). It slips on the end of these old lenses and uses modern ring filters.

Hopefully in the near future I will be able to get out and make some captures that demonstrate Zone control using development times; Normal, push, and pull.

Saturday, March 26, 2011

Caffenol, Flash, & Neopan400 @ 1600EI


It's been about a week since I did anything with my ongoing Caffenol experimentations. Yesterday I loaded up another roll of Neopan400 and shot it indoor at 1600EI with a flash. The film was developed using the same Caffenol C-L formula and stand processed for 75 minutes.

I'm not sure just how I like it with the higher key lighting and fill flash -still thinking about it I suppose. The grain started to show up, and the sharpness dropped off a bit while the tonal graduation also suffered a bit compared to the same push in Xtol.

Overall, the end result is acceptable, but not stellar like the low-key lighting I previously shot. The low-key results were amazing to me, whereas this I think shows some limitation. Perhaps limitation isn't the best description of these results. I mean after all, this is a two stop push for the film, and anytime you underexpose by two stops quality begins to fall off.


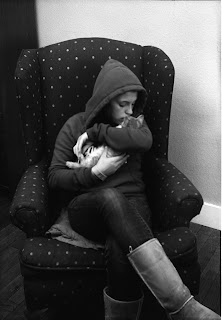
In the photo of the child there are bright whites, but the skin tones didn't produce the same as the photo of the man. I think that is mainly the fault of the indirect fill flash judging by the photo above where the knit cap has brilliant high-key tones.


Sometimes when testing a film/developer combination the result can be confusing. There have been times when I have been confused by the reaction the tested film/developer combination has responded to different lighting situations. With this film/developer combination I received some of that confusion. The snapshots of family were taken indoor with flash, and the results are pretty similar.


Today we had a nice little snow storm roll through, and so I loaded up another short roll to see how this combination would react to the high-key snow and ambient lighting. Now we lean back towards the stellar end of the spectrum with this combination and push speed. I almost couldn't believe how well it held the high-key tones, lack of visible grain, and still produced nice low-key tones. I am impressed with the sharpness of this scene in ambient light. That's pretty sharp for a 400 speed film pushed to 1600. The photograph is of my Tiger Lily beds that started to spring up last week when the temps were 70 degrees.


I think Neopan400 does quite well in Caffenol, and I will continue to use this combination in the future. Now I need to start testing some other films with Caffenol....

Sunday, March 20, 2011

Coffee, Film & The Evironment

I'm a film Junkie. I'm a film hoarder. I don't want a cure. It's a hopeless disease.
Film isn't dead, it's just becoming harder to find in some cases. Such is the case with Fuji Neopan 400 film. They absolutely stopped producing it in 120 format over a year ago. Then over the past six months the 35mm version seems to disappear, then reappear from supply chains. Recently I found a retailer who was discounting their re-branded Neopan400 so I picked up two 100' bulk rolls. I love all film, but some films are truly remarkable in what they can do. I've used this film pushed to 1600 EI on a regular basis for the past several years, and love the results. Developed in Xtol there is almost no grain in the 120 format, and very tame grain in the 35mm format. With my photographic style, I enjoy shooting at the upper end of the f-stop range to give really long DoF. Using this Fuji film has made that very easy to do given the latitude it has. So now that I am set for a while with stock of this film, I decided to do some experimenting with it.

Enter Caffenol and the environment. I am not what anyone could label "eco freak", but I do believe in being responsible in life. If there is a way to go about my daily life that induces less hazard waste into the environment, then I do it. A month or so ago I was reading about using coffee based film developers and was intrigued to say the least. My thought was that this could be a nice alternative and eco-friendly method to enjoy my hobby. My first couple attempts using Caffenol were not what I would get excited about. I was using it with short dev times in the neighborhood of 15 minutes. The results were okay, but not spectacular. In other words, I would be disappointed to have to use it all the time.

What I like about the Caffenol theory is the very low toxicity it presents. The main ingredients are all common household items with the exception of one optional ingredient. Those ingredients are Arm&Hammer washing soda (sodium carbonate) Vitamin C, Potassium Bromide (used widely in veterinary practices to prevent seizures) and finally, instant coffee. The potassium bromide is optional as it's main effect is to reduce the amount of fog left on the film after development. With my first attempt at Caffenol I ended up with a lot of base fog. That could be a result of a couple different things I was doing at the time, but since then I decided to just add 1gram of potassium bromide and ensure there is no fog. For me personally this decision was in part due to the film scanner I have not coping well with the fog.

All was not lost in my adventures with Caffenol though. I saw that a popular method was to use it in a full stand develop method. Today I decided to do that very thing, and do it with one of my favorite films Fuji Neopan400. I rolled up a short 12 exposure roll, setup one of my X-700 Minolta twins with a 100mm macro lens, and started shooting. I pushed the film 2 stops to EI 1600. I mean if I was going to experiment, why not see if Caffenol can produce the results I would expect from Xtol pushing it to 1600? Sounded good to me, off I went. For the development I used the below formula, and developed for 75 minutes at 20c. For the first 30 seconds I inverted the tank, and then dropped it into my water temp bath for the rest of the time. For the stop bath I used tap water for one minute, and then used my normal fixer. The results really impressed me. There was amazing amounts of very sharp detail, and the grain was less than I get using Xtol on the 35mm version of Neopan400. In keeping with the environmentally sound mindset, lets talk about the fixer. I am currently unaware of any fixers that do not use commercial chemicals, however, the Kodafix fixer is good. After it is exhausted it can be completely neutralized by dropping a wad of steelwool into the jug for a week. This chemically changes the fixer and it is then safe for normal disposal. So, at the end of the day, it is possible to use environmentally sound practices to develop film, and enjoy spectacular results at the same time. I am a believer in Caffenol now.


Recipe
Arm&Hammer Washing Soda 16g
Vitamin C 10g
Potassium Bromide 1g
Folgers Instant Coffee 40g
75 minute stand development 20c
Water to make 1 litre.

Wednesday, March 16, 2011

Film Developers & A Legend

When I contemplate a film-developer combination that I haven't already tried, I think of Geoffrey W. Crawley. Mr. Crawley passed away last year, but his legacy of photographic contributions will live on for a very long time. He spent a very large part of his life devoted to formulating film developers that would optimize different emulsions with predictable results. He worked with all the different types, or groups, of developers that we have today. He was largely known for his different FX type developers, but there were many others he touched and improved upon. For his work and devotion to film I am personally grateful as developing film still holds a unique pleasure for me that I cannot imagine living without.


What's the relevance between Mr. Crawley and what I do? Simple. It seems that I am never content with the film-developer combinations that I have tried over the years, and I continue to tinker with new combinations. No, I am not the formulary genius that Mr. Crawley was, but I do enjoy seeing what variations I can reach. Sure, I have already established a nice collection of favorite combinations, but sometimes the pleasure is in the journey of something new.

What drives me to try new combinations is simply the "look" that each one gives different than the next. One film emulsion can look completely different in two different developers. For example Tri-X developed in high concentrations of Rodinal (1+25) will have massive grain. That same Tri-X developed in HC-110 in the very dilute F-G will have very tame and unnoticeable grain.

Another good example of getting two uniquely different "looks" from the same emulsion is Fomapan 400. I really love Foma films, and feel their emulsions are very good. With their Fomapan 400 speed emulsion, that film leans toward a natural high noticeable grain. In Rodinal it has very large grain and that doesn't seem to matter which dilution is used either. Now, if you take that same film and develop it in Microphen, there is a whole new world to this film. All the sudden the grain is just gone, and perceived sharpness is very high.

How this all ties together with Mr. Crawley is that he promoted individuals learning to mix and use a wide variety of developers. With an understanding of how the different types of developers work on an emulsion, and with some basic chemistry equipment a person can mix from scratch their own formulas custom suited to their needs. I like this idea. Not only can developers be mixed from scratch, but the cost significantly drops when doing so.

So recently I set out on a venture to do some night photography and I used some Fomapan 400 film. When I picked Fomapan 400 for my project it was mainly because I have a gross hoard of the stuff that I just haven't been shooting. After the first night roll of Fomapan I experimented with developing it in HC-110 at 1+100 semi-stand. That experiment worked pretty well. The grain of that film was significantly reduced, but it did lose some speed. This got me thinking again about what I was doing, and why. After a while I decided to get back to my favorite developer for that film which is Ilfords Microphen. The problem with that is cost. Microphen comes in a powder mix for 1 litre of stock developer and the cost is about $7 plus shipping. Hummm. So if I develop at 1+1 dilutions I will get a whopping six 120 rolls per litre. That's over a buck a roll for developer. Sure, that doesn't seem bad, but multiplied by some 80 rolls of the stuff and the cost is noticeable.

The solution? Mix my own equivalent formula to Microphen. Buying the bulk chemicals -which are readily available- I am able to mix 1 litre of stock formula for $2.32 That translates to a more palatable .39 cents for developer per roll of 120 film. Suddenly the smile comes back to my face, and off I go looking for ways to use up some 80 rolls of a film I love in a developer that makes it shine.

Friday, February 25, 2011

BHF Cable Release & Tripod Mount


I really like these old cameras. They are so simplistic, dependable, and cheap that it's hard not to enjoy using them. They shoot 6x6 film, and most will shoot fine with a 120 roll on the feed side, and a 620 spool on the takeup.

There are two things that I always wished I had with my BHF's in the field. One is a cable release, and the other a tripod mount. A while back I had seen on the web where people have added these refinements with some decent success, so I decided to give one of my the same upgrades.

Functionally everything works very well, just as it should. The aesthetics are nice too, although the cable release hole was a bit of a challenge to keep strait. I was using a cordless drill, and a workbench to make the holes needed. I believe the best would be to anchor the pieces on a drill press if you have one accessible.

To complete this project, a couple of items are needed from the hardware store. For the tripod mount I used a 1/4x20 acorn nut. I thought this would be the best since it is solid and I wouldn't have to worry about light leaks when it's not on a tripod. The next critical item is the threaded bushing that will anchor the cable release point. For this I was able to find a round aluminum threaded bushing that fits perfectly to my cable release. It took a few minutes combing through all the stuff they had trying them with my cable release in hand, but they had a perfect fitting bushing so I was happy. The next item from the hardware store was some epoxy to bond the new pieces to the camera body. Lastly, some flat black paint to spray over the epoxy'd acorn nut. Tools needed were simple also. I used a cordless drill and a couple different bits for the appropriate sized holes needed, and a phillips head screwdriver.


For this process I disassembled the camera as if you were cleaning the lens. That is to open the shells and remove the film box from the front of the camera including removal of the metal plate that covers the shutter assembly. Once disassembled, I was able to measure very carefully where to locate the cable release bushing. The best advice I can give is to measure the depth to the backside of the camera face, and also the depth to the plane just beneath the shutter cover plate. Once measured, transfer these measurements on top of the camera between the shutter button and the looking lens. This is where the hole will be drilled to drop the threaded cable release bushing into place and epoxy. It took a few steps to reach the final depth for this bushing. I was content to drill and measure with the cable release operation in order to get it correct without drilling too far. Once I verified that the cable release operated fully, I then epoxy'd the bushing into place. Before reassembly, to ensure the camera face was light tight, I stuffed some tight woven black felt under the shutter mechanism cover plate.


The tripod mount was very simple to install. With the shell open, I measured to the centerline and about 3/4 of an inch back from the lip. Here I drilled a hole large enough for the 1/4x20 acorn nut to seat well. Once situated, I carefully taped the acorn nut into position from the outside of the camera shell. This allowed me to apply the epoxy from the inside without it oozing all over my work surface. Once dried, a quick shot of flat black paint and everything was set. It should be noted that something will be required make this area light tight as there will be a round hole larger than the hex flats on the acorn nut. Even though the epoxy is dense, it does transmit light and would fog the film. The photos I took were actually prior to the painting for mine.


In all, I think I have about two hours in this project, and can hardly wait to try this BHF out using timed exposures, or just using the foolproof tripod mounting. Why go through all this when I have dozens of cameras that already have provisions like these??? Well, why not do it? I love my BHF cameras and consider them well worth a little upgrade to make them more usable.